Monday, October 31, 2011

Giving Way To Birth, . . .Before Silas Was Born


Before Silas was born, . . . .

It's hard for me to think of where to begin with this story. To just go into the details of his birth or just describing the events the day Silas was born feels like to little. There is so much more behind the story and leading up to the birthing process. From the moment I found out I was pregnant again, I began preparing for birth. A lot of this pregnancy was about facing my own mortality, looking at death and really letting go and accepting what life has to offer.

After my mom died a year and a half ago, life turned a different color for me. Everything became sharper and more vivid, I realized what was important in my life and I learned to let go of a lot of things that didn't matter. I grew up in a way that I needed. I felt pain I had never felt before. It was the hardest experience I ever went through, and I still grieve for her. At the same time, my mom's passing opened up an opportunity for me to learn about myself and grow in a way that I couldn't have done without experiencing her loss. I am grateful for that.

When I found out I was pregnant again in Febuary, the close experience I had with losing a loved one sent me into my own tunnel of fears and insecurities. Two years earlier, when my daughter was born, I had an innate trust in my body, I "knew" I could birth her. I wasn't afraid. This time was a completely different experience. Looking at death so closely, seeing my mom's body after her death really hit home to me how we are literally here one moment and gone the next. I was afraid of dying.

In the last months of pregnancy, as I got closer and closer to the birth of Silas, the fear of dying during or immediately after labor became stronger and stronger. I actually remember at one point saying to myself, "If I make it through this birth, all bets are off, life will continually surprise me with it's own path and I have no control over it." In some way, I needed to experience this birth to firmly remind me that I am powerless over life and death. That I don't get to make that decision. That life will take me where I am meant to go.

The days before Silas arrived, there was a letting go. I remember feeling more at peace. Whatever was to be would be, and by then I was feeling so uncomfortable in my body, that I was ready to face the challenges of labor. I had an amazing team in place, each of whom I loved and trusted. There was a part of me that was worried that any fear that I had left over would hinder my birthing process and make it more difficult. When in fact, I learned, that it was only during the process of birthing, that I was actually able to really let go into my fear, feel it fully and release it.

My daughter's birth was about being present and not having expectations. My son's birth was more about accepting "what is", making room for "it" in the present and not judging myself for whatever I was feeling. I am incredibly grateful to have had such wonderful birth experiences, each with their own challenges and most of all moments of pure bliss. Birth can be that as well as hard work and painful. Giving birth was transformational to me. I am incredibly blessed to have been able to experience it fully not only once, but twice in my life.

Saturday, October 22, 2011

39 weeks and the tub is ready to go!


Yes! I hope to give birth in that! So exciting! For those of you that may have read Serafin's birth story, you all know she was birthed at home, sans water (an experience I've always hoped to have). We had planned for a water birth, but didn't manage to quite make it in there on time. As a matter a fact we didn't even get around to rolling it into the room to start filling it up!

We'll see what happens this time around! So far so good! I'm feeling ready as well as the gamut of other emotions that come and go, excitement, anxiousness, curiosity, all of it, . . .


Please wish us your love and light!

xoxo

Love to you all!


Wednesday, October 19, 2011

Fun at the Little Farm


For those of you that don't know, Tilden Park has a lot of great attractions, the Berkeley Botanical Gardens, the steam trains, amazing trails and even a little farm. Here kids can learn about the different types of farm animals and even get a chance to feed them. Serafin loves going to it. She particularly has an affinity towards the pigs, how could you not, they're so cute, "snort snort".

Unfortunately for the munchkin, the last time we went it was a bit late in the day and the "piggies had gone to bed" already. We still had fun walking around and feeding the goats and cows. If you catch them during the week on a good day, apparently you can even get fresh eggs. They have so many chickens that they are always on the lookout for a willing taker (Me! Me! Me! Nothing like fresh eggs.). Below is a video of Serafin feeding the cows, . . . MOOOOOOOOO!


What to do with left-over phyllo dough???


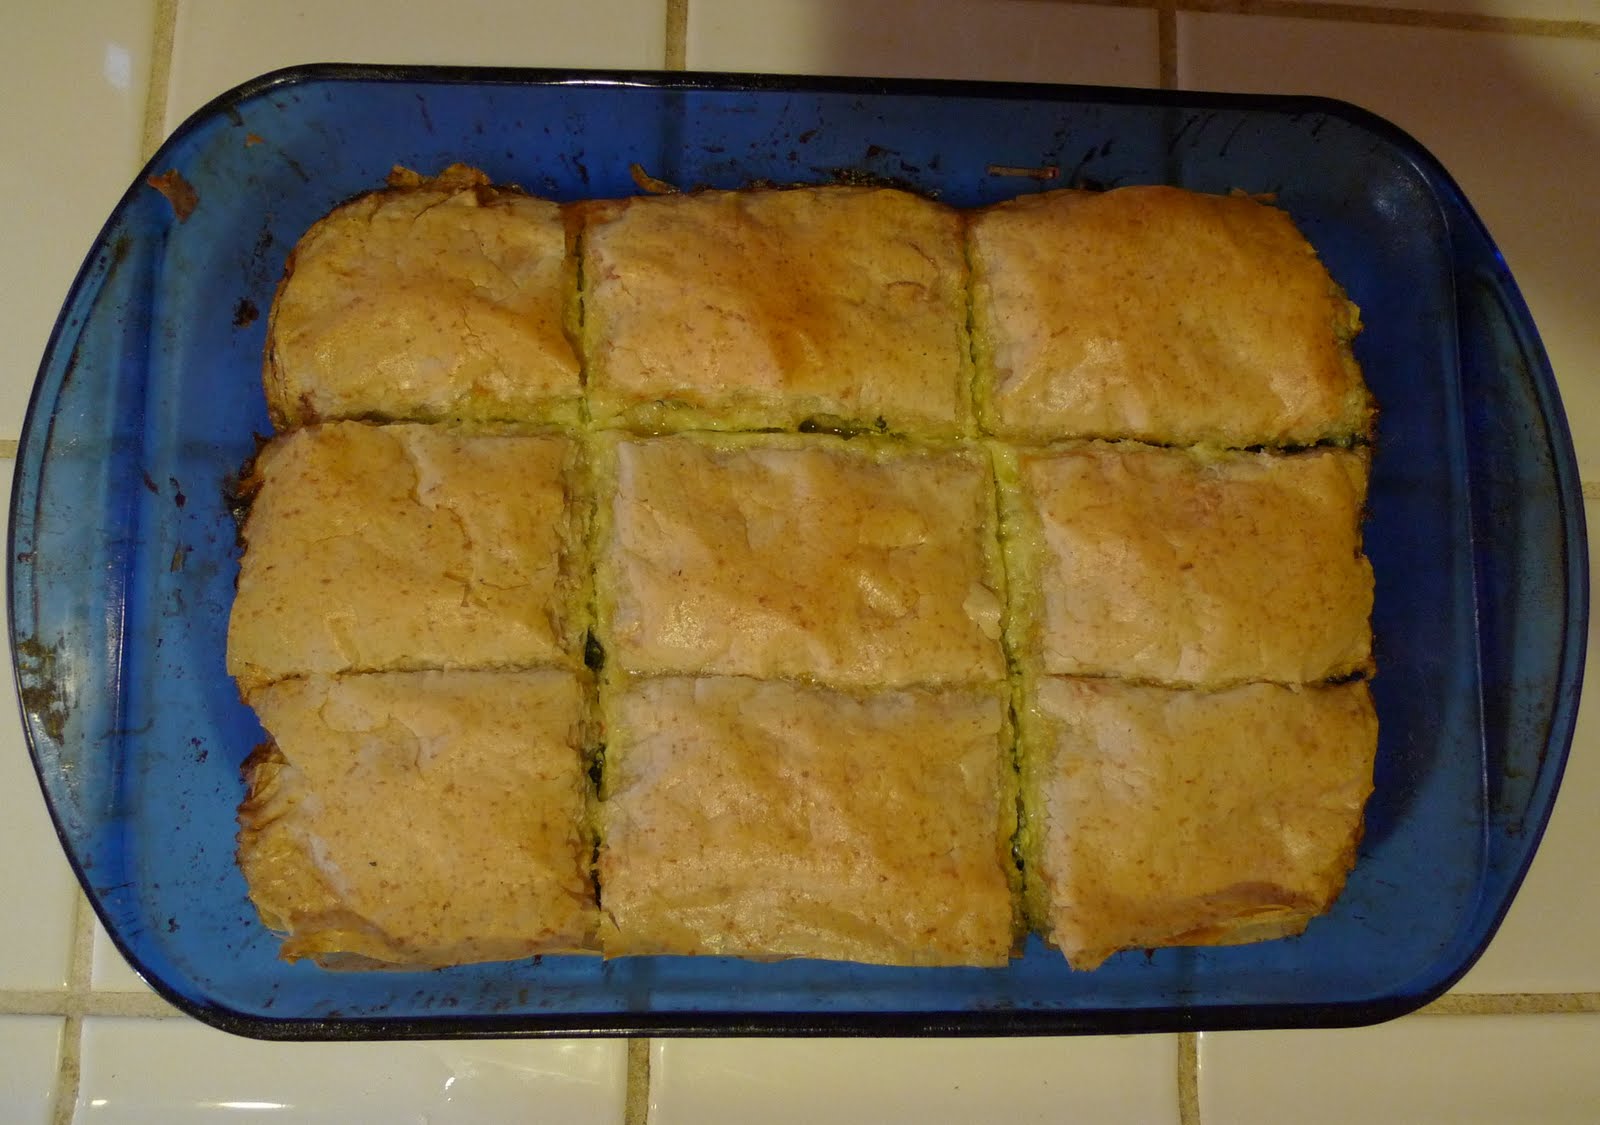
Make some Spanakopita!

Remember the Baklava I made just a few weeks ago?? Well, I bought extra phyllo dough just incase I might need it and it has been sitting in my freezer since. Because I know I'm not going to be cooking for a little while after this baby is born (any day now!) I decided to make some Spanakopita (Greek spinach pie) to have for now and to freeze for later. It has been a regular Greek fest in this house in the past couple of months. I don't know what it is, but this pregnancy has me salivating over all the Greek goodies of my past.

I followed this recipe. The only tweaks I would make is to add some extra feta cheese, and use fresh spinach (no questions, the taste is so much better). And, . . . of course, I used whole wheat phyllo dough which I prefer. I like my Spanakopita to have a nice think layer of spinach, so I found that this recipe only made one large 9x12 dish and a smaller 8x8 portion--not two 9x12 dishes.

The Greek in me gave this recipe a thumbs up, with the extra cheese it would have been even more finger licking good! Enjoy!


Monday, October 3, 2011

Rainy day crafting, . . . Halloween decorations!


I had fun making these little Halloween candle decorations with the munchkin this afternoon! It was a rainy day so it was perfect for staying in and pulling out crafts. Serafin mostly had fun sticking tissue paper to the jars and getting messy. It was fun to see her reaction once I lit them up, her entire face smiled.

This was my first time working with Mod Podge, loved it, a glue, sealer and gloss all in one, definitely a new staple in our house! I have to give credit to the website where I found the idea, they have lots of other fun ideas I might try too! This one was fun, quick and easy!

Friday, September 30, 2011

Baklava!


Yet another family tradition! Every year my Dad would get out the baking pans and make a huge portion of Baklava to enjoy during the holidays. He would give it to friends and family as a delicious treat when they came over for visits as well as gobble up one himself. Mmmmmm. I always enjoyed this undertaking and when I could, I helped him make it.

A couple of weeks ago my hubby sent me a link to the the Honey Harvest Hootenanny on October 1st ( link ), a fundraiser for an awesome place in downtown Oakland that teaches people how to live more sustainably. They put on fun events and also have interesting classes, everything from farming, rainwater harvesting, bee keeping and even arts and crafts. If I wasn't pregnant, I would have really enjoyed partaking in their bee-keeping series. You can check out their website at http://aplaceforsustainableliving.org/

During this "Honey Harvest Hootenanny" they are holding a competition of foods made with honey that don't have any refined sugars in them. Gary then suggested some Baklava. At first I rolled my eyes and thought, "Yeah right, at 8 months pregnant? You got to be kidding me!" But as you've read in previous posts, somehow my nesting instincts have strayed away from cobwebs and dusty corners and been more geared towards cooking and crafting. I bought the ingredients and I decided to put it together.

Now Baklava has a reputation of taking forever to make, it really wasn't all that bad. Overall, from beginning to end, I think it took about 3 hours. The original recipe that came from my grandmother's cookbook was not an option because it uses white sugar, not only that, but to be honest, I always had trouble understand what the heck she was talking about. A lot of times her measurements would be along the lines of, "a spoonful of this" and "a shot full of that". Without my Dad to help me, I decided I needed a more "legit" recipe to follow. Sorry Yayoula! I started looking for alternative recipes and found this awesome blog called The Nourishing Apron. I CAN'T WAIT to try other recipes that she's posted. This Baklava recipe was inspired by hers, although not without my own tweaks and knowledge of making this scrumptious dessert.

Here ya go!


Baklava:

-The night before, thaw out phyllo dough in the fridge. Keeping the dough in the box, set out an of hour before assembling Baklava so that it will come to room temperature.

- First, make the syrup

Ingredients for syrup:
2 cups of water
1 cup of dates, pitted and quartered
2 cups of honey
1 Tbs of cloves

-Simmer all ingredients, except the honey, in a covered pot for about 1/2 hour.


-Pull syrup off stove and ad honey, stir and set aside to let cool.


Ingredients for pastry:
1 lb box of whole wheat phyllo dough
2 sticks of butter
1 Tbs allspice
1 1/2 lbs of pecans
Small hand-full of whole cloves for decoration

-In food processor, coarsely grind pecans


-Add allspice to pecans and blend a few seconds more

-Melt 2 sticks of salted butter in a pot.

-Butter bottom of a 9x13 inch platter

-Take phyllo out of package and put on baking sheet, usually the phyllo sheets are large and can be cut in half to fit almost directly into your 9x13 inch platter. Important(!): Cover dough with a damp kitchen towel so that it doesn't dry out between uses.

-Add a layer of phyllo dough to bottom of platter, then drizzle and brush butter on.

-Add 6 more layers of dough the same way.

-Take a handful of pecans and spices and put a thin layer on top of doe, a bit heavier than a "sprinkle".


-Cover with another layer of phyllo dough, butter, and pecans. Note: In the beginning you may have to cut the phyllo do to fit the pan.

-Repeat process three or four times.

-Re-enforce with an extra layer of phyllo dough and butter (no pecans). Then start process again till all the nuts are gone.

-Add 4 more layers of butter and dough.

-Cut diagonally and put a clove into each square.


-Cook in oven at 350 degrees for about 30-40 minutes till golden brown.

-When baklava comes out of the oven, poor syrup between pieces of baklava, you should hear a nice sizzle. Be careful not to cover entire piece with syrup as it will make it soggy.

-Set aside and let it cool! It's usually best eaten room temperature after it has "firmed up" a bit and the honey has been sucked into the pastry.

Mmmmmmm! Salivating again!

Tuesday, September 27, 2011

Nesting? or , . . . Crafting!


So I think that this pregnancy has inspired a different form of "nesting" for me. Instead of cleaning the dirty corners of the closet (which I probably should be doing) I have been getting my craft on instead. Projects I have going on, . . . making a x-mas stocking for the new addition (a family tradition), making stuffed felt red stars for Serafin to decorate and give to the family as holiday gifts, re-upholstering those dang dining room chairs (STILL and currently a no-go situation. I swear they WILL get done one day!) and last but not least, the Halloween costume for the munchkin.

Fortunately, I have finished the costume! Unfortunately, as of yet, she refuses to put it on! Who knows, I may be in labor on Halloween, so even if I can get her used to it by then, it still may have to wait till next year!

Anyway, my darling Serafin loves ladybugs, so I started to try and figure out what I can put together. I'm really no good at my sewing machine, something I aspire to improve upon, so I was determined to try and figure something. It's amazing what you can find online, after doing a search on "no sew" lady bug costumes I managed to put together a mish mash of a lady bug get up.

First, . . . the wings (no sew, all you need is the material, a pair of scissors and some glue!)


Then of course, . . . the tutu (they are surprisingly easy to make).


And, . . . last but certainly not least, lady bug antennae (not sure about these, I think they might need a re-do, any ideas?)


Add some black leggings and a black top and voila my friends, you have yourself a little lady bug! Now if I can only get her interested in wearing it--will ad a picture when I do (even if it's in the middle of May)! Bahhhhh!